Checklist for Joining a Solar Co-op in Manasota
A practical checklist to join a Manasota solar co-op—eligibility, roof readiness, installer selection, permits, costs, incentives and timeline.
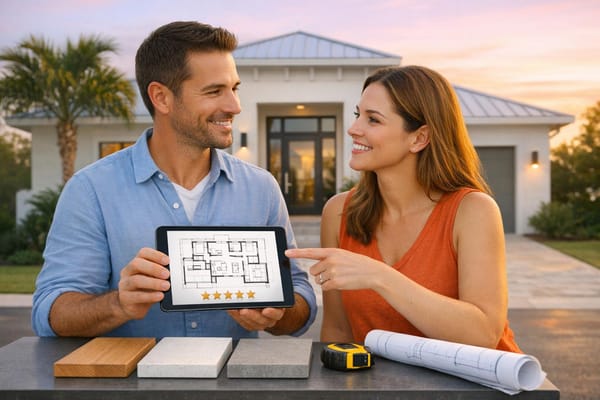
Want to save on solar and simplify the process? Joining a solar co-op in Manasota might be the solution. Here's what you need to know:
- Eligibility: Own property in Manatee or Sarasota counties (e.g., Bradenton, Sarasota, Lakewood Ranch). Renters aren’t eligible.
- Benefits: Group buying lowers costs, vetted installers ensure quality, and co-ops offer guidance throughout the process.
- Steps: Check your roof’s condition, review energy usage, and sign up online. Once the group selects an installer, you’ll receive a custom proposal without obligation.
- Costs: A 10-kW system typically costs $25,000-$29,000 before incentives. Federal tax credits and Florida exemptions can reduce this significantly.
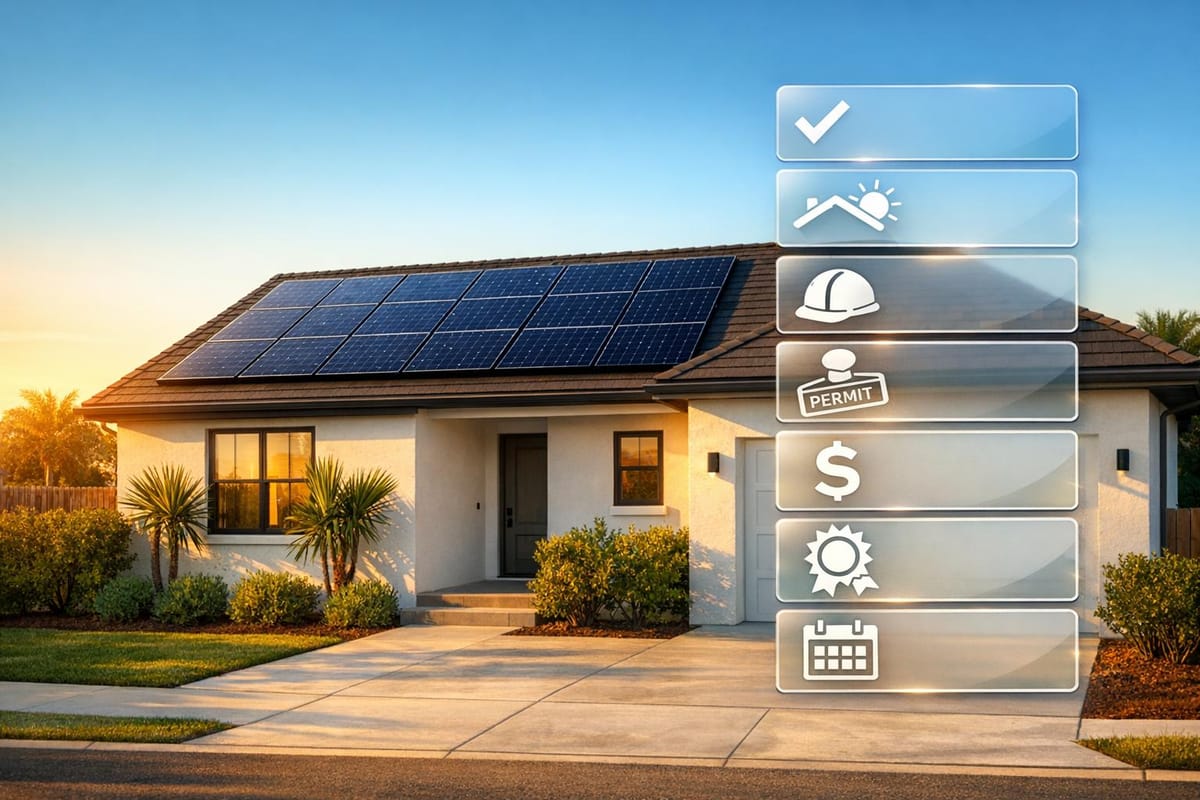
- Timeline: Permits and installation take weeks, but the savings last for decades.
Ready? Start by confirming your eligibility and take the first step toward affordable solar power.
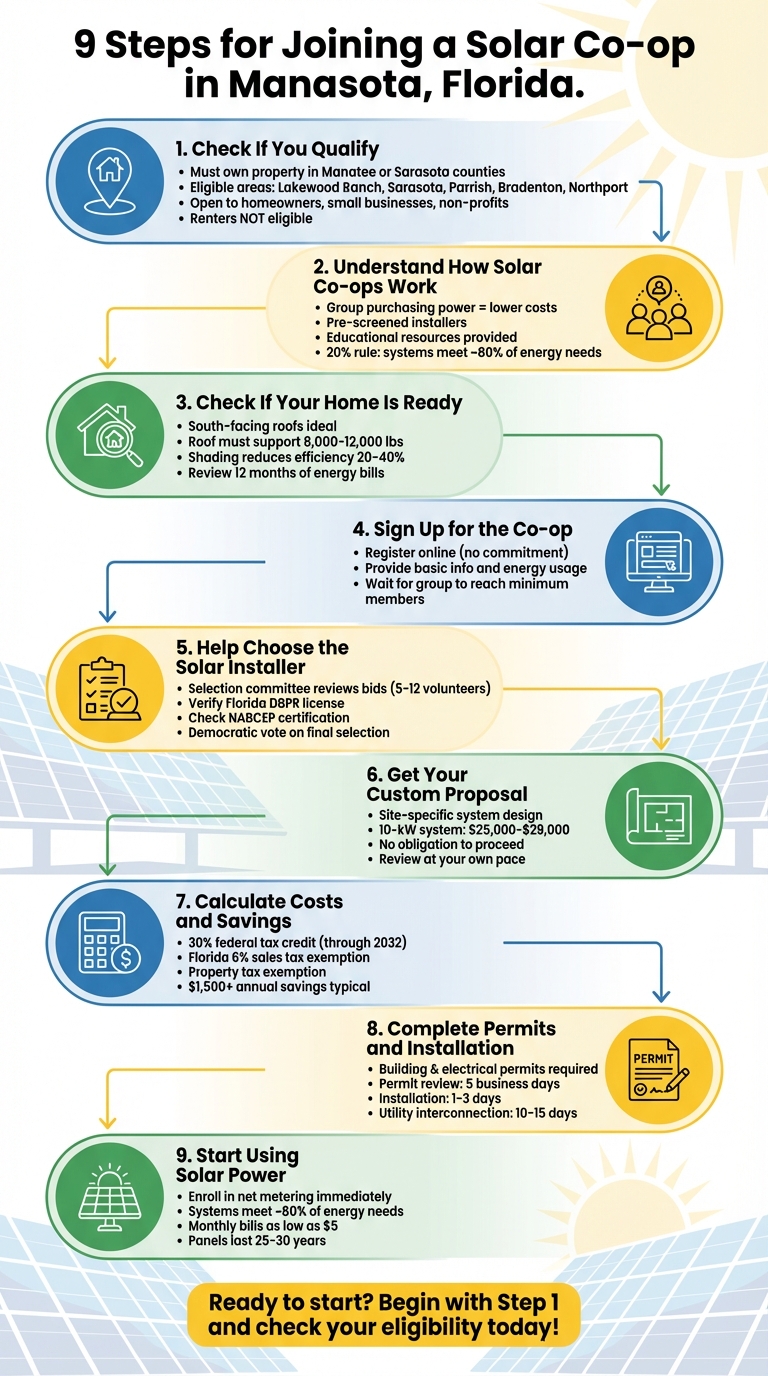
9-Step Process for Joining a Solar Co-op in Manasota
How does a solar co-op work?
Step 1: Check If You Qualify
Before diving in, ensure you meet the basic criteria for joining a solar co-op in Manasota. The good news? There are no income limits or complicated requirements to worry about.
Where You Need to Live
To qualify, your property must be located within the Manasota area, which includes parts of Manatee and Sarasota counties. Eligible locations are:
- Lakewood Ranch
- Sarasota
- Parrish
- Bradenton
- Northport
If your property falls outside these areas, unfortunately, you won’t be able to join the local co-op. Double-check your location to confirm eligibility before moving forward.
Who Can Participate
The co-op is open to residential homeowners, small businesses, and non-profit organizations. There are no income restrictions, so as long as you own property in the designated area, you can join. However, renters are not eligible since solar installations require legal authority to make roof modifications and a long-term commitment to the property.
If you’re part of a non-profit or small business, make sure you have the proper approval to make property upgrades before signing up. As long as you own the property and have the right to install solar panels, you’re good to go!
Step 2: Understand How Solar Co-ops Work
Once you've confirmed your eligibility, the next step is to get a clear picture of how solar co-ops function. Having a solid understanding of the process will help you make smarter decisions and know exactly what to expect along the way.
How Solar Co-ops Operate
Solar co-ops bring together homeowners and businesses to pool their purchasing power, allowing members to negotiate better prices for solar installations. Here's how it works: First, members join the co-op, participate in learning sessions, and collectively choose a pre-screened solar installer. Once the installer is selected, each member gets a custom proposal tailored to their property. You’ll have the chance to review this proposal carefully before committing.
By working as a group, co-op members secure lower per-watt costs. On top of that, the co-op thoroughly vets the installer, so you can feel confident about the quality of the service. This process not only saves money but also simplifies the decision-making process by ensuring reliability and value.
Learning Opportunities
Most solar co-ops go a step further by offering educational resources to help members fully grasp the details of solar energy. These materials cover topics like system sizing, energy production estimates, and how solar panels perform in Florida's unique climate.
One important takeaway is the "20% rule." Solar systems are typically designed to meet about 80% of your energy needs, leaving room for expected energy losses. This approach ensures a balance between cost-effectiveness and efficient system performance.
Step 3: Check If Your Home Is Ready for Solar
Before joining the co-op, it’s essential to confirm that your home is suitable for solar panels. This step can save you from unexpected costs or complications down the line.
Roof Condition and Orientation
In Florida, south-facing roofs are ideal for capturing the most solar energy, though west-facing sections can also perform well. Use a compass app at midday to determine your roof’s orientation, and take photos to document how sunlight hits your roof throughout the day.
Your roof’s age and condition are just as critical. For example, if your asphalt shingles are older than 15 years, it’s wise to replace them before proceeding. Additionally, your roof must be able to handle the extra weight of the solar panels - each one weighs between 40 and 50 pounds, meaning the entire system could add 8,000 to 12,000 pounds.
Inspect your roof for missing shingles, sagging areas, or other visible issues. Don’t forget to check the attic for signs of water damage, rot, or pest problems. If you’re unsure whether your roof can handle the load, hiring a structural engineer is a good idea. A professional inspection typically costs between $300 and $500.
Shading is another factor to consider. Trees or nearby buildings can cut solar panel efficiency by 20% to 40%. Spend a day observing how shadows move across your roof and trim any overhanging branches that block sunlight.
Current Energy Consumption
Once you’ve ensured your roof is ready, take a close look at your energy usage. Review the past year’s electricity bills to find out how many kilowatt-hours (kWh) you use each month. Keep in mind that energy consumption in Florida often rises by 25% to 30% during the summer due to air conditioning. To calculate your average monthly usage, divide your total annual kWh by 12.
You can also use your utility provider’s app or website to monitor daily energy usage. This might help you spot energy spikes caused by malfunctioning appliances. If you’re planning to buy an electric vehicle, add a pool pump, or expand your home, factor these changes into your calculations, as they’ll increase your energy needs.
Finally, check the amperage rating of your home’s electrical panel. Older homes with 100-amp service may need an upgrade to 150 or 200 amps to safely accommodate solar power. This upgrade typically costs between $1,500 and $4,000.
Pre-Installation Efficiency Upgrades
Before finalizing your solar system size, take steps to reduce your home’s energy waste. Upgrading insulation, switching to energy-efficient lighting, or replacing old appliances can lower your overall energy demand. This might allow you to install a smaller and less expensive solar system.
As PES Solar explains:
"The goal is matching your solar generation capacity precisely with your household energy demand to maximize return on investment."
Once you’ve completed these upgrades, use tools like the PVWatts estimator to get an idea of how much solar energy your system could generate.
Step 4: Sign Up for the Co-op
Once you've confirmed that your home is ready for solar, the next step is joining the local Manasota co-op. This is where you team up with neighbors to explore solar energy options together. It’s a step toward making solar installation more affordable through group efforts.
Register Online
Start by filling out the co-op’s online form. You’ll need to share some basic details like your name, address, contact information, and a rough estimate of your monthly electricity usage. Don’t worry - this step is purely to show your interest and doesn’t require any financial commitment.
Wait for the Group to Grow
After you’ve signed up, the co-op will work on reaching the minimum number of members needed to move forward. During this time, you’ll get email updates and may have the chance to attend informational sessions to learn more about the process.
Step 5: Help Choose the Solar Installer
Once the co-op reaches the minimum membership threshold, it’s time to work together to select a trusted installer.
Compare Installer Bids
A selection committee - made up of 5 to 12 volunteer members from the co-op - will review proposals submitted by local installers. To help you make an informed decision, you’ll receive a bid table outlining key details like pricing, equipment, warranties, experience, and project timelines. Co-op organizers are there to clarify technical points but won’t steer you toward any specific installer.
When evaluating bids, it’s critical to focus on Florida-specific qualifications. All installers must hold an active license from the Florida Department of Business and Professional Regulation (DBPR). This could be an Electrical Contractor (EC) license or a Solar Contractor specialty license. You can verify their licensing status and check for any disciplinary actions through the DBPR’s online portal. Additionally, make sure the installer has general liability insurance and workers' compensation coverage. Florida Statute §440.10 makes property owners potentially liable for injuries to workers who aren’t insured.
While not a legal requirement in Florida, look for installers with NABCEP certification (North American Board of Certified Energy Practitioners). This credential demonstrates a high level of expertise and professionalism. It’s also worth confirming their experience with local utility companies like Florida Power & Light or Duke Energy. These utilities have interconnection processes that typically take 30 to 90 days, and familiarity with their paperwork can help avoid delays.
Once you’ve carefully reviewed all the bids, you’ll move on to vote for the installer that best meets the co-op's needs.
Vote on the Final Selection
The co-op members then vote to select the installer offering the best overall value. This decision goes beyond just the lowest price - it also takes into account factors like warranty terms, the company’s reputation, and their understanding of local building codes and fire safety standards in areas like Manatee and Sarasota counties.
The voting process is democratic, giving every co-op member a voice. Once the votes are in, the co-op signs a group contract with the chosen installer. This contract secures the negotiated pricing and terms for all members who decide to move forward with their solar installations.
Step 6: Get and Review Your Custom Proposal
With the installer contract in place, the next step in your solar journey is receiving a customized proposal tailored specifically to your home. Once the co-op finalizes the installer agreement, this proposal will show how group savings translate into a solar plan designed just for you.
Personalized System Design
Your proposal will include a site-specific system layout, showing how the solar panels will be arranged on your roof. The installer will consider factors like your roof's angle, orientation, and any shading caused by trees or nearby buildings. This thoughtful design ensures a balance between cost and energy efficiency while accounting for potential efficiency losses from dust, shading, or energy conversion.
The proposal will also outline the equipment specifications, including the type of solar panels (monocrystalline or polycrystalline), inverter details, and system monitoring features. For reference, a standard 10-kW system in Florida typically costs around $25,000, though some proposals may reach up to $29,000. It will highlight the 30% federal tax credit and confirm the Florida 6% sales tax exemption for solar equipment. Make sure the sales tax is excluded from your itemized bill, as this is legally required.
Additionally, the proposal will provide an estimate of your system's annual energy production (in kWh) and explain net metering policies. These policies vary depending on when your system is installed. For example:
- Systems installed before 2024 may receive credits at 100% of the retail rate.
- Installations during 2024–2025 typically receive 75%.
- Installations in 2026 and 2027 drop to 60% and 50%, respectively.
Carefully review these details to ensure the proposal aligns with your energy goals and financial expectations.
Decide Without Pressure
You are not obligated to proceed with the installation. The co-op model gives you access to group pricing and a vetted installer, but the choice to move forward is entirely yours. Take your time to evaluate the financial breakdown, system design, and projected savings. If the proposal doesn't fit your budget or your roof isn't suitable for solar, you can decline without facing any penalties. The co-op's goal is to provide clear, detailed information and options - not to pressure you into a decision.
Step 7: Calculate Costs and Savings
When considering solar, it's crucial to evaluate the complete financial picture. This step helps you understand upfront expenses, potential incentives, and the long-term financial benefits of making the switch.
System Pricing
In Manasota, solar system prices typically range between $18,000 and $50,000, with a standard 10-kW system costing around $25,000 to $29,000 before applying incentives. If you join a solar co-op, you can often reduce these costs through bulk purchasing. Make sure your proposal includes a detailed breakdown of equipment and labor costs, as this is essential for claiming tax exemptions and credits.
Tax Credits and Rebates
The federal Residential Clean Energy Credit offers a 30% tax credit on the total cost of your solar installation, covering both equipment and labor. This rate will remain at 30% through 2032, then decrease to 26% in 2033 and 22% in 2034. You can claim this credit using IRS Form 5695 for the tax year when your system becomes operational. The credit directly reduces your tax liability dollar-for-dollar, and any unused portion can be carried forward to future tax years.
Florida provides additional financial perks. The state sales tax exemption eliminates the 6% sales tax on equipment purchases (labor costs are excluded), while the Florida Property Tax Exemption (under Florida Statute § 196.182) ensures your home's assessed value won’t increase due to the solar installation. To activate this exemption, notify the Manatee or Sarasota County Property Appraiser after your system is installed. If you include battery storage, systems with at least 3 kWh capacity qualify for the federal credit, provided they are charged at least 70% by solar energy.
Once you’ve accounted for these incentives, you can better understand your upfront costs and potential savings.
Long-Term Financial Benefits
After applying tax credits and rebates, it’s time to assess how these savings impact your investment over time. The long-term reduction in your electric bills will depend on your current energy usage and your utility’s net metering policies. Be sure to review how net metering credits work, as excess energy is often credited at the utility’s avoided cost rate, which is usually lower than standard residential rates.
To calculate your financial benefits, start by subtracting the 30% federal tax credit from your system's total cost. Then, factor in the monthly savings on your electric bills to estimate when your system will pay for itself. This "break-even point" is a key metric in determining the overall value of your solar investment.
Step 8: Complete Permits and Installation
Now that you’ve reviewed your customized proposal and estimated your savings, it’s time to tackle the final steps: getting the necessary approvals and installing your solar system. While your installer will manage most of the heavy lifting, understanding the process can help avoid unnecessary delays.
Manatee and Sarasota County Permits
In both Manatee and Sarasota counties, solar installations require building permits and electrical permits before any work begins. The building permit ensures that your roof and mounting hardware meet Florida's strict wind load and weight distribution standards, while the electrical permit confirms that the wiring, inverters, and grid connections comply with the National Electrical Code (NEC) Article 690.
Your licensed solar contractor will handle the paperwork, submitting detailed documents like technical blueprints, site plans, electrical schematics, and load-bearing assessments to the local building department. Florida law mandates that local governments review single-trade solar applications within 5 business days. Permit fees vary based on system size and jurisdiction, typically falling between $100 and $1,000.
In addition to permits, your installer will also file an interconnection application with your utility provider (such as Florida Power & Light, which serves much of the Manasota area). This approval, which usually takes 10 to 15 business days, is required before your system can legally connect to the grid. By starting the permitting and interconnection processes simultaneously, you can avoid delays when it’s time to activate the system.
Installation Timeline
Once permits are approved, the installation itself typically takes one to three days. During this phase, your installer will arrange for two key inspections: a rough electrical inspection before the system is energized and a final inspection after all work is completed. Many Florida jurisdictions offer next-business-day inspections, keeping the project on track.
It’s crucial to hire a licensed electrical or solar contractor, as they’re the only professionals authorized to pull permits and ensure code compliance. Keep all related documents - permits, inspection certifications, and contractor invoices - on hand. These will be essential when claiming the 30% federal tax credit.
After passing the final inspection and having your utility install the bi-directional meter (usually free of charge), your system is ready to go live. With all permits and inspections completed, you’re set to start generating solar power.
Step 9: Start Using Solar Power
Reduce Your Electric Bills
Once your solar system is installed and the final inspections are done, you're ready to enjoy the benefits. After the bi-directional meter is in place, make sure to enroll in Florida's net metering program as soon as possible. Timing matters because credit rates for surplus energy will decrease in the coming years. For instance, applications submitted after 2026 will only receive credits at 60% of the retail utility rate, and this drops to 50% for applications in 2027 and beyond. Right now, surplus energy is credited at around $0.108 per kilowatt-hour.
In Manasota, solar systems generally meet about 80% of a home's energy needs, leaving a 20% margin for grid electricity. For Florida homeowners in this area, that translates to savings of over $1,500 a year on electricity bills. With a larger system (10 kW or more) and smart energy use, some residents have reduced their monthly bills to as little as $5. Use the monitoring tools provided with your system to track energy production and plan usage. Running high-energy appliances like air conditioners, water heaters, or EV chargers during peak sunlight hours can help you maximize those savings.
This approach not only cuts down on your reliance on grid electricity during expensive times but also boosts the long-term value of your solar investment. With solar panels designed to last 25 to 30 years, these savings can add up significantly over time.
Connect with Local Solar Users
Owning a solar system does more than lower your bills - it often connects you with a broader community. Solar co-ops in the Manasota area frequently turn into lasting support networks. Many members continue to stay in touch through casual meetups, online forums, or local events where they share maintenance tips and energy-saving ideas. These connections offer practical advice and foster a sense of community, making solar ownership a more collaborative and rewarding experience.
Wrapping It Up
Joining a solar co-op in Manasota isn’t just about switching to renewable energy - it’s about leveraging group purchasing power to get competitive pricing that’s tough to find on your own. Plus, the co-op takes care of crucial tasks like vetting installers and navigating permits in Manatee and Sarasota counties, giving you expert guidance every step of the way.
By working through the nine outlined steps, you’ll be ready to check your eligibility, assess your home’s solar potential, and make confident choices about transitioning to solar energy. This process simplifies what can otherwise feel like a daunting task, taking much of the guesswork out of going solar.
Ready to cut your electricity bills and join a growing network of local solar enthusiasts? Start with Step 1 - check your eligibility. The sooner you dive in, the sooner you’ll start seeing the rewards.
FAQs
What documents should I gather before signing up?
Before joining a solar co-op in Manasota, make sure you have the necessary documents ready. These might include proof of property ownership or residency to confirm your eligibility. You could also need recent utility bills or a valid form of identification. Since requirements can vary, it’s a good idea to check directly with the specific co-op for their complete list. Preparing your paperwork ahead of time can make the process smoother and quicker.
Can I add battery storage through the co-op?
Currently, there’s no specific information about whether battery storage can be included as part of the solar co-op. The available resources mainly cover topics like solar policies, community advantages, and program guidelines, without addressing battery storage options. To get a clear answer, it’s a good idea to reach out to the co-op directly for more details.
What happens if my roof needs repairs first?
If your roof needs repairs, it’s wise to handle them before joining a solar co-op. Solar panels need a solid, stable roof for proper installation. Fixing any issues ahead of time can save you from future headaches, like having to remove and reinstall panels just to address roof work later. By tackling repairs first, you ensure your roof is ready to safely support your solar system for years to come.